Gel Nail Application 101: Your Ultimate Guide
Are you looking to step up your nail game and achieve that flawless, salon-quality look from the comfort of your own home? Look no further because we’ve got you covered with our ultimate guide to gel nail application. Gel nails have surged in popularity due to their durability, versatility, and the opportunity for endless creativity. In this comprehensive guide, we’ll walk you through every step, tip, and trick you need to know to master the art of gel nail application.
Understanding Gel Nails
What Are Gel Nails?
Gel nails are a type of artificial nail enhancement that offers a natural look and feel. They are created using a special gel substance that hardens when exposed to UV or LED light. Gel nails have gained widespread acclaim for their durability and flexibility, making them a preferred choice for many.
Types of Gel Nails
There are primarily two types of gel nails:
Hard Gel Nails: Hard gels are thicker and are typically used for nail extensions. They provide more strength and are ideal for those seeking long and dramatic nails.
Soft Gel Nails: Soft gels are thinner and more flexible, making them ideal for overlaying your natural nails or for creating delicate nail art designs.
Gel Nails vs. Acrylic Nails
While both gel and acrylic nails offer long-lasting beauty, they differ in several ways:
- Gel nails tend to look more natural and glossy.
- Acrylic nails are stronger but can sometimes appear less natural.
- Gel nails require UV or LED curing, whereas acrylic nails air dry.
- Gel nails are more flexible, while acrylics are harder.
Tools and Materials
Essential Tools for Gel Nail Application
Before you dive into the world of gel nails, it’s essential to gather the right tools. You’ll need:
- UV or LED lamp
- Gel nail polish in your desired colors
- Base coat and top coat
- Nail files, buffers, and cuticle pushers
- Isopropyl alcohol and nail cleanser
- Nail tips (if you’re doing extensions)
Choosing the Right Gel Nail Kit
To simplify your gel nail application, consider investing in a quality gel nail kit. These kits often include everything you need to get started, from gel polish to curing lamps. Be sure to choose a kit that suits your skill level and desired nail style.
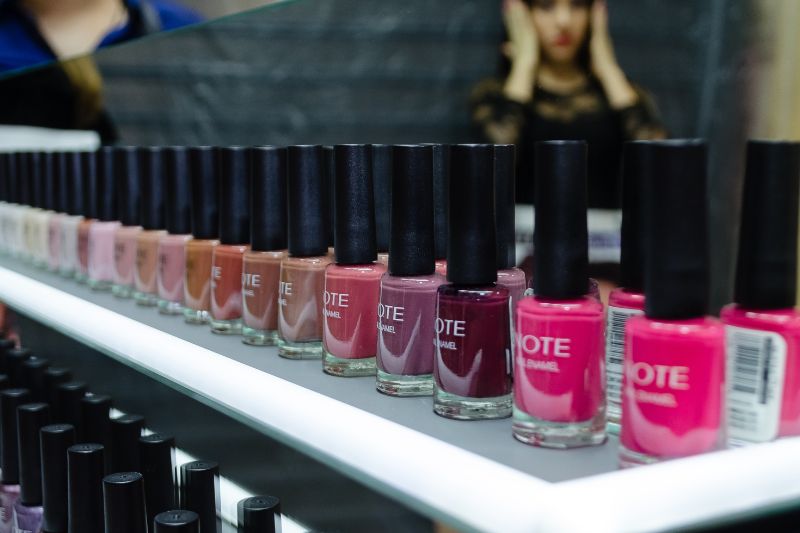
Gel Nail Polish Options
Gel nail polish comes in various formulations, including traditional, soak-off, and no-wipe. It’s crucial to understand the differences between these types, as they affect the application and removal process. Traditional gel polish requires a base and top coat, soak-off gel polish does not, and no-wipe gel polish eliminates the need for a final cleanse after curing.
Preparing Your Nails
Removing Old Nail Polish
Before applying gel nails, start with a clean slate. Remove any old nail polish using acetone or a non-acetone nail polish remover. Ensure your nails are completely polish-free and clean.
Shaping and Filing Your Nails
Next, shape and file your natural nails to your desired length and style. Common nail shapes include square, round, oval, and almond. Be sure to file gently and evenly to avoid any rough edges.
Cuticle Care and Maintenance
Healthy cuticles are crucial for a neat nail appearance. Gently push back your cuticles using a cuticle pusher and apply cuticle oil or cream to keep them soft and moisturized.
Nail Cleansing and Sanitization
Importance of Clean Nails
Clean nails are the foundation of a successful gel nail application. Any dirt, oils, or residue can affect the polish’s adhesion and longevity. Thoroughly cleanse your nails to ensure a pristine surface.
Nail Sanitization Process
Cleanse your nails by first wiping them with isopropyl alcohol or nail cleanser to remove any remaining oils. This step is vital to promote proper adhesion of the gel polish.
Tips for Avoiding Infection
Maintain the highest hygiene standards during gel nail application to avoid potential infections. Always use clean tools, and avoid contact with unclean surfaces or objects.
Applying Gel Nail Extensions
Pre-Made vs. Custom Extensions
When opting for nail extensions, you can choose between pre-made nail tips or custom-sculpted extensions. Pre-made tips are easier for beginners, while custom extensions offer more creative freedom but require advanced skills.
How to Apply Nail Extensions
For pre-made tips, select the right size, apply nail glue, and press them onto your natural nails. Trim and shape as desired. If you’re sculpting custom extensions, this process will require more time and skill.
Tips for Achieving a Natural Look
To ensure your extensions blend seamlessly with your natural nails, make sure they are the correct size, and file them to your preferred shape. Buff and blend the joint between the extension and your natural nail for a natural look.
Gel Nail Polish Application
Base Coat Application
Start with a thin layer of base coat, making sure to cover the entire nail. This helps the gel polish adhere better and protects your natural nails.
Applying the Gel Color
Apply your chosen gel color in thin, even layers. Cure each layer under the UV or LED lamp as instructed by the product. Repeat until you achieve your desired color intensity.
Creating Intricate Designs and Patterns
Gel nails offer endless possibilities for nail art. You can experiment with different colors, textures, and techniques, such as ombre, marbling, or hand-painted designs. Let your creativity shine!
UV or LED Curing
Understanding the Curing Process
Curing is the magical step that transforms the gel from a liquid to a solid. UV lamps use ultraviolet light, while LED lamps use light-emitting diodes to initiate this process. Follow the recommended curing times for each layer.
Choosing Between UV and LED Lamps
UV lamps are more affordable but require longer curing times, while LED lamps are faster and more energy-efficient. Your choice should align with your needs and budget.
Proper Curing Times
Curing times vary based on the brand and product you’re using. Always follow the manufacturer’s recommendations for the best results.

Perfecting the Gel Nails
Applying Additional Coats
For an even and vibrant finish, you may need to apply multiple coats of gel polish. Ensure each layer is cured properly before adding the next one.
Avoiding Common Application Mistakes
Common mistakes include applying thick coats, neglecting the cuticle area, and not curing properly. Pay close attention to these details for a professional finish.
Achieving a Smooth and Even Finish
Use a top coat to seal your design and achieve a smooth, glossy finish. Be meticulous with your application to avoid streaks or bubbles.
Maintenance and Longevity
Tips for Long-Lasting Gel Nails
To maximize the lifespan of your gel nails, protect them from harsh chemicals and avoid using your nails as tools. Apply cuticle oil regularly to keep your nails hydrated.
Dealing with Chipping or Lifting
If you notice chipping or lifting, use a fine-grit buffer to smooth the area and apply a small amount of clear gel to fix the issue. Be gentle to avoid damaging your natural nails.
How Often Should You Fill or Redo Your Gel Nails?
Gel nails can last anywhere from two to three weeks, but it depends on your nail growth and the care you provide. You’ll typically need a fill or a complete redo to maintain their appearance.
Removing Gel Nails
Safely Removing Gel Nails at Home
To remove gel nails at home, soak them in acetone, gently scrape off the softened gel, and moisturize your nails afterward.
The Importance of Professional Removal
For the best results and to avoid damaging your natural nails, consider professional gel nail removal. Nail technicians have the expertise and tools to ensure a safe process.
Caring for Your Natural Nails After Removal
Once you’ve removed your gel nails, be sure to pamper your natural nails. Apply nail strengthener and cuticle oil to help them recover and regain their strength.
Nail Health and Safety
Keeping Your Natural Nails Healthy
Nail health should always be a priority. Ensure you’re providing your natural nails with proper care, including moisturizing, trimming, and protecting them.
Common Nail Problems and Solutions
Learn how to address common nail issues, such as nail fungus, dryness, or brittleness. Taking preventive measures can save you from potential nail woes.
Allergies and Sensitivities to Gel Products
Some individuals may develop allergies or sensitivities to gel nail products. If you experience any adverse reactions, discontinue use and consult a dermatologist.
Nail Art and Design Inspiration
Exploring Nail Art Ideas
Embrace your artistic side and experiment with various nail art ideas. From French tips to geometric designs, the options are limitless.
Tools and Techniques for Nail Art
Discover the tools and techniques used by professional nail artists to create intricate and stunning nail designs.
Staying Trendy with Your Gel Nail Designs
Stay up to date with the latest trends in nail art and design. Follow your favorite nail artists and influencers for inspiration.
In conclusion, mastering the art of gel nail application opens the door to endless possibilities for creativity and self-expression. With the right tools, techniques, and a little practice, you can achieve salon-quality results from the comfort of your own home. So, roll up your sleeves, gather your supplies, and embark on your journey to stunning gel nails that make a statement and reflect your unique style.